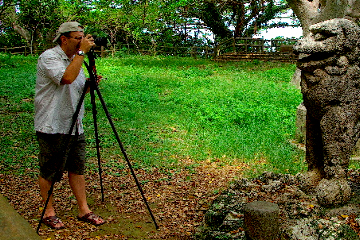
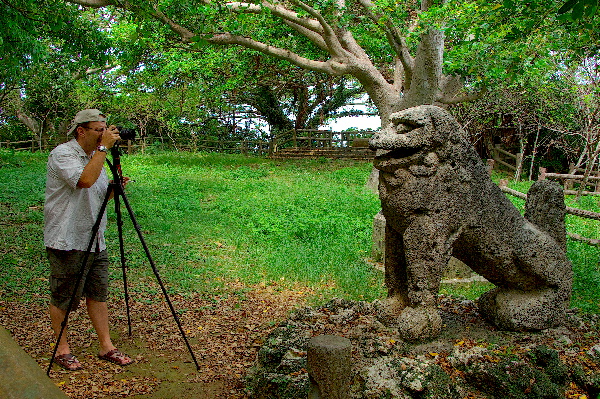
Photo courtesy of Mike Lynch.
Here are the top ten things you’ll want to know before investing in one:
Cost
Everyone wants to get the best deal they can but, a cheap tripod will not enhance your photography. The little $10.00 aluminum ones are good for nothing, unless you plan on taking all your photos while it’s set up on your coffee table.
For a point and shoot camera, you may get by spending under $50.00. If you have a DSLR, plan on spending at least $100.00. There’s always the option of buying a used tripod to save costs as long as you know what to look for.
Folded Height
For travel, you need to know how small you can fold your tripod. Will it fit in a suitcase, backpack or a carrying case that you can wear comfortably on your shoulder?
Make sure it’s not too large that you can’t carry it on a plane.
Weight
See how much it weighs; you’ll more than likely be carrying it a lot in your travels. The best tripods are wooden but they are extremely heavy. Aluminum, titanium and carbon fiber have made modern tripods much lighter. Just make sure whichever you buy, it is sturdy.
Maximum Height
This is as important as minimum height. With your camera mounted on it, make sure you can elevate the tripod to eye level. If not, you’ll be doing a lot of bending over.
Maximum Weight
This is the maximum weight the tripod was designed to support. If you have 10 lbs of camera and lenses to mount on a tripod designed for a maximum weight of 8 lbs, it will bend or break. At a minimum, it will be moving while you’re trying to shoot.
Quick Release
This is a feature that allows you to keep part of the hardware screwed to the bottom of the camera and easily press a lever to install or remove it from the tripod.
It’s a good idea to buy extra quick release shoes to mount on all your cameras, if you have more than one.
Ball Head
Some tripods come with this feature built-in, with others you have to invest in buying them separately. The ball head allows you to “pan” the camera (follow a moving subject) smoothly without creating more noise in your photos from camera shake.
Center Post
This is the pole that can be raised or lowered on the tripod. It should be reversible so you can get lower to the ground for flower and macro shots.
When it’s upright, look for a hole or hardware to attach weight to at the base of the center pole. Sometimes, when it’s windy, even the weight of a camera bag will help steady a tripod from swaying in the breeze.
Footing
Look at the tripod’s feet to see how much room you need to set it up and check for rubber boots to prevent scratching floors or sliding on smooth surfaces.
Some tripods have retractable metal spikes for steadying the camera when you’re on ice, soil or uneven terrain.
Position Locking
See how the leg sections and center pole are locked into position. There are knobs to turn, hand cranks or clamps you squeeze to raise or lower your tripod and secure it in position.
Make sure you check them all out and find which style works best for you and your camera.
Community Connection
If you’re wondering which accessories are the most important to buy for your camera, check out 3 Items Worth Buying Now for Your Travel Photography as well as our resource page focused on travel photography.
MatadorU Travel Photography Program
MatadorU’s Travel Photography Program gives you direct feedback on your work, and lifetime access to the most supportive, dynamic, and fun community of Travel Writers, Travel Photographers, and New Media Professionals on the web.
About the Author
Related Posts
7 Comments... join the discussion!
-
-
How much would a carbon fiber tripod cost?
↵ -
I generally agree that you need to suck it up and buy quality (and expensive) gear the first time rather than buying cheap & having to replace it 3 times….HOWEVER, i found a killer mini-tripod for my point & shoot at Meijer for $2. TWO DOLLARS!. It was small, portable, flexible and worked amazingly. I’ve been trying to find another one since, but haven’t been able to find it
↵ -
Michelle,
Not all that complicated, I look at it like buyin’ a pair of shoes. Just bring your camera in the store and see how it fits on all of them before you buy one!↵ -
Oliver and Kevin,
Thanks for stopping by and your comments. Not knowing what cameras you shoot with, it’s hard to advise. The Manfrotto I use ran around $150 last time I looked but, I’m in Japan. That make comes from Italy and, I would guess it’s about $50 less in the USA.
Really, you need to take your camera with its heaviest lens mounted on it and visit a camera store where you can try them all out. When you find one that suits you check online and see if what competitive prices you can find for your favorite model.
When I use my 500mm lens, it’s really too heavy for the Manfrotto. When I save up enough for a Gitzo ($700-$850 range) that’ll be my next purchase.Joel,
I agree, there are lots of less expensive tripods for point and shooters, even a bean bag or some of the monkey and gorilla pods available can do the trick. Over at http://www.thephotoargus.com they even have links to lots of gadgets you can make at home you may want to check out to stay in the $2-$3.00 price range and they got amazingly good reviews by some who tested them.Cheers,
Mkike↵ -
I found this tripod online that fits over any standard waterbottle. I realize that you probably don’t have a lot of control with it, but it sure beats carrying around a bulky tripod.
http://www.gentsupplyco.com/Bottle-Cap-Tripod
↵


