How to Pack Your Camera and Lenses for Travel

Travel
by Luke Armstrong Jul 29, 2009
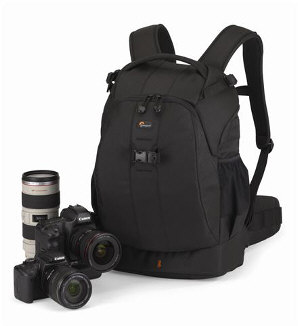
There are few sights more horrific for a travel photographer than finding the expensive camera gear you’ve packed ruined due to poor packing technique.

MatadorU logo

GEAR COSTING THOUSANDS of dollars can be rendered useless quite easily. Accidents happen, and when they do they can tarnish trips. By putting a little forethought into how to pack your camera gear and adhering to the following suggestions, you can avoid looking at the sad sight of a cracked lens.

Checking camera gear

As a travel photographer, checking cameras at the airport is generally a bad idea. Baggage handlers are experts at breaking even seemingly unbreakable things. If your amount of gear forces you to check your camera gear, careful attention should be paid to how to pack it.

  • Roll all items in several layers of Bubble Wrap® . This will serve to absorb impacts that are sure to happen along the way. Additionally, you can pop the bubbles to celebrate when your gear arrives at your destination undamaged.
  • Put all your camera gear in a bag specifically designed to carry expensive electronic gear. They should be packed in such a way that there is little space for your items shift around. T-shirts are perfect space fillers and offer added protection and padding.
  • The camera bag should be placed away from firm and jagged objects that could knock against and damage your gear.
  • Be sure all lenses are covered. As some lens caps easily slip off, it’s a good idea to use masking tape to secure the covers.
  • If you’re old school enough to still be using film, make sure to hand-check it, as X-ray machines might erase your pictures.
Loading gear in your camera bag

Constantly wrapping your gear in Bubble Wrap® and unwrapping while traveling is inconvenient, but there are other precautions you can take as a travel photographer when thinking about how to pack your gear. Keep it towards the top of your pack. This is handy for quick access and also shelters cameras and lenses from weight that could damage them.

LowePro Flipside Bag

Price: $149.95 | BUY

The camera bag that you select for your gear should be waterproof. LowePro has a line of waterproof bags in various sizes and styles that are great for a travel photographer. Select a bag with enough compartments to keep your gear organized.

Overstuffing a camera bag is a great way to damage items. Lenses stored vertically tend to fare better than when stored horizontally.

Packing gear such as memory disks and batteries in Tupperware helps keep it safe and keeps out the moisture.

If you have a camera with multiple lenses, be sure to remove the lens from the camera when not shooting.

Frequently check camera bag straps for wear. A broken strap can easily lead to a broken camera.

If your camera gets wet — as tempting as it is to turn it on to see if it works — don’t. Running a current through it while wet can permanently damage the circuits. Instead, be patient. Open the battery slit and let it dry for at least 24 hours before trying to turn it on.

* With experienced faculty, a robust curriculum, and an active and networking community of fellow travel photographers, the MatadorU Travel Photography program will teach you how to become a travel photographer, including how to pack your gear.

Discover Matador